Last updated November 18, 2026





Free written scope consultation - allowances, timeline, and change-order rules on paper before a single trade is scheduled
Driveway & Pavers Troubleshooting in North Miami: Common Problems and How to Fix Them
If your pavers are sinking in the same spot every rainy season, replacing those pavers won’t fix anything. That’s a drainage or base compaction problem, and it will swallow new pavers just as fast. Most driveway paver failures we’re called out to look at in North Miami get misdiagnosed the same way: the homeowner sees a low spot or a loose block, and the fix gets aimed at the surface. The real failure is almost always six inches underground, in the base layer, in the sand, or in how water is leaving the site. This guide teaches you to read the symptoms correctly so you’re not paying for the wrong repair twice. By the end, you’ll know how to tell a base failure from a bedding failure from a surface stain, run a string-line test yourself, and understand why sealer clouds and joints sprout weeds.
Quick Answer
Most paver problems in North Miami come down to water and base movement, not bad pavers. Gradual, pattern-shaped sinking points to a failing base or poor drainage; random wobble points to bedding sand washing out; white staining points to moisture migrating through the slab beneath. Each one has a different repair protocol, and patching the surface without fixing the cause lets the problem return. A free written estimate that includes a proper base inspection is the fastest way to know which repair you actually need.
Styles & brands we work with
- Kitchen remodeling
- Bathroom remodeling
- Home additions & ADU
- Roofing
- Windows & doors
- Driveway & pavers
- Fence
Table of Contents
- How Do You Diagnose a Paver Problem Before You Spend Money?
- Base Failure vs. Bedding Failure: How Do You Tell Them Apart?
- Why Do Pavers Sink in the Same Spot Every Rainy Season?
- What Is That White Staining on North Miami Driveways?
- Why Do Weeds Keep Coming Back Through the Joints?
- The String-Line Test: Relay or Full Base Excavation?
- Why Did Your Sealer Bubble, Cloud, or Peel?
- Cracked and Chipped Pavers: Surface Problem or Something Deeper?
How Do You Diagnose a Paver Problem Before You Spend Money?
Diagnosis starts with three questions: where is the problem, when does it appear, and what does it look like right after rain. Answer those honestly and you’ll usually know whether you’re looking at a surface, bedding, or base issue before anyone touches a shovel. Getting this wrong is expensive. Replacing ten pavers over a washed-out base buys you one dry season, then the same dip shows up again, because nothing under the surface changed.
Here’s the routine we walk homeowners through over the phone, and it works on almost any driveway in North Miami:
- Map the symptom. Note exactly where the sinking or wobble is. Is it one or two blocks, a straight line, or a whole rectangular section? Pattern-shaped areas suggest something underneath is moving. A single loose block suggests a local bedding issue.
- Watch it through a rain. Look for standing water, water sheeting off the driveway into the yard or toward the house, or water pooling at the garage threshold. Where water sits is where the base is soaking, softening, and settling.
- Press and listen. Step on the suspect area. A hollow or gritty crunch tells you bedding sand has shifted. Solid movement with no crunch usually means the base is compacting under the pavers.
- Check the edges. Edge restraint that has pulled away, tilted, or cracked lets the whole field spread. Once the edge goes, the middle follows.
- Look at the color and texture. Chalky white film, flaking tops, or dark damp patches are surface and moisture clues, not structural ones, and they’re treated differently.
Do this inspection during the wet season, not the dry one. A paver problem that’s invisible in February can be obvious in August, and North Miami’s summer rain pattern exposes base and drainage weaknesses that a dry-month inspection misses. For a deeper look at how we build and repair these systems, see our driveway & pavers work.
Base Failure vs. Bedding Failure: How Do You Tell Them Apart?
A base failure is a movement problem in the compacted layer under the sand; a bedding failure is a problem in the roughly one-inch sand layer right under the pavers. They look similar from standing height and completely different up close. Mixing them up is the single most common reason a repair doesn’t hold.
Signs of a Base Failure
- Sinking is gradual and spreads over months, not days.
- The dip follows a whole area or a pattern line, not a single random paver.
- It reappears in the same spot after every heavy rain.
- Adjacent pavers rock together as a group when you step on them.
- The area sits near a downspout, a low corner, or where water leaves the site.
Signs of a Bedding Failure
- A few random pavers wobble or rock while their neighbors stay solid.
- You can feel grit or sand in the joints when you press.
- The dip is shallow and localized, often near the driveway entrance where tires turn.
- Joint sand is washing out faster than the rest of the surface.
Why the Distinction Matters
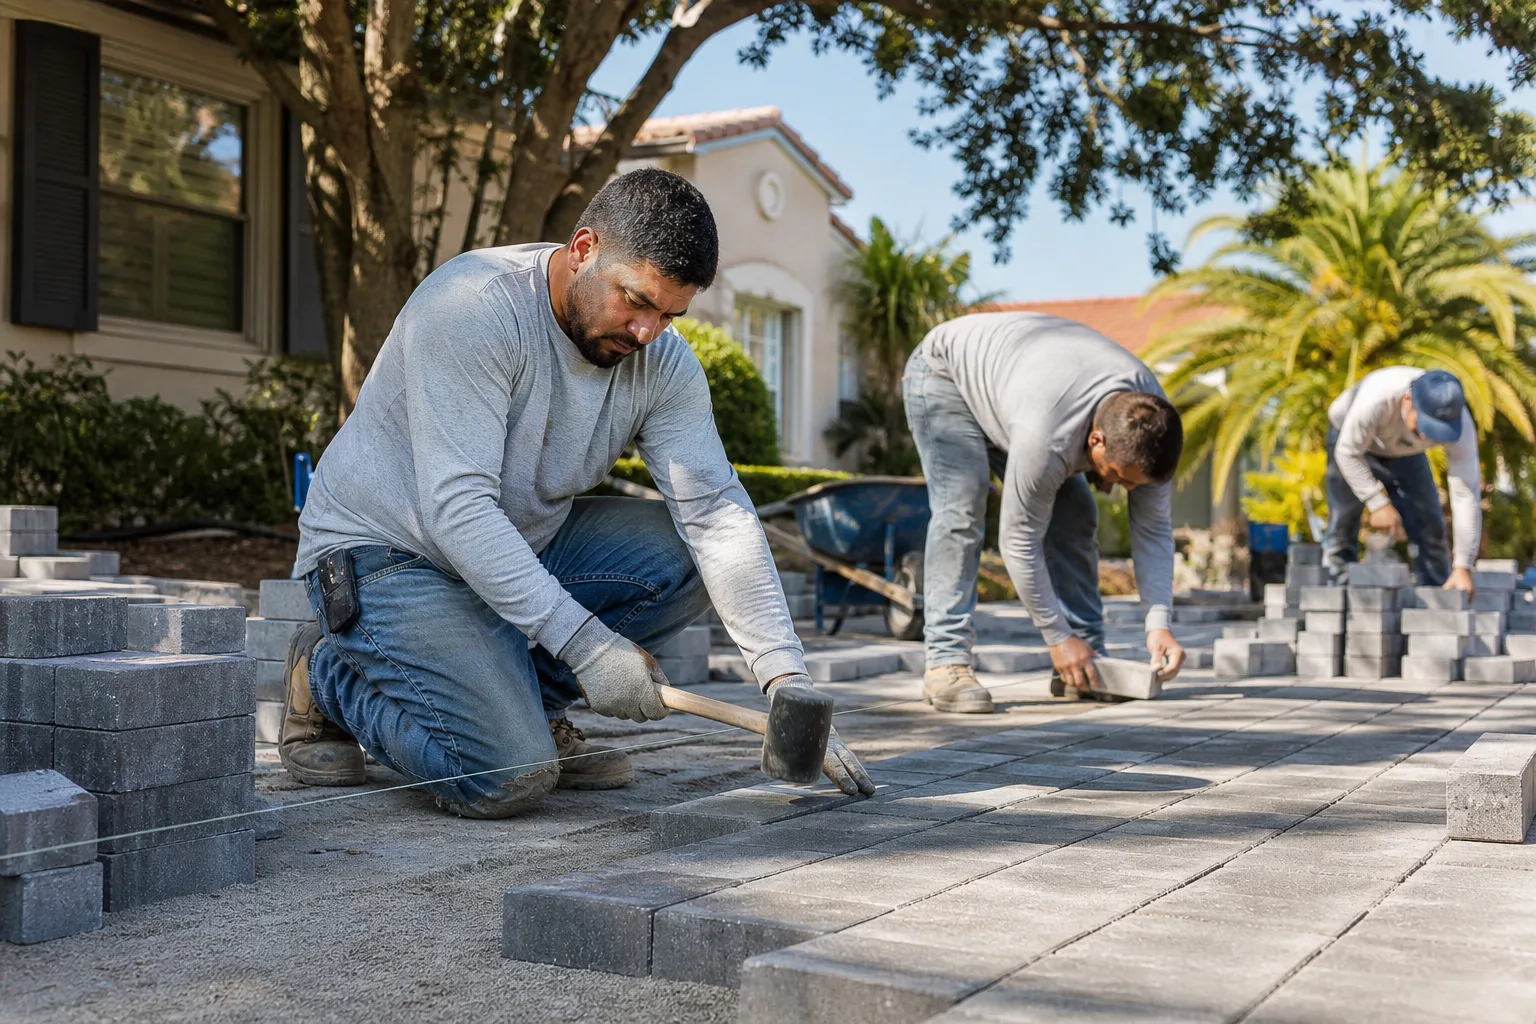
A bedding failure is often repairable by lifting the affected pavers, re-screeding the sand, and re-setting them with fresh polymeric joint sand. A base failure requires excavating down to compacted base material, correcting whatever is letting water in or holding it there, re-compacting in lifts, and re-laying. Skipping straight to the sand fix on a base failure is the expensive shortcut, because the new sand migrates right back out. On a North Miami driveway, our technicians have up to 9 years of experience reading these cues and can usually tell which one you have before the first paver comes up.
Why Do Pavers Sink in the Same Spot Every Rainy Season?
Pavers that sink in the same place season after season are telling you water is pooling or moving through that spot and undermining what’s underneath. It isn’t the pavers themselves. Concrete pavers are dense and dimensionally stable; when they dip, something below them has lost volume, shifted, or failed to drain. In North Miami, where summer storms drop heavy rain in short windows, the driveway is often the lowest, flattest, most exposed hard surface on the property, and that’s where the weakness shows first.
The usual causes, in the order we find them:
- Poor site drainage. The driveway grades toward a spot with nowhere to go, so water stands there and soaks into the base through the joints.
- Inadequate base compaction. Base material installed too thin or compacted in one thick lift instead of thin ones settles under traffic.
- Downspout discharge onto the driveway. Roof water dumped onto the pavers concentrates flow into one channel.
- Missing or failed edge restraint. The perimeter lets go and the field spreads, opening joints and letting sand and water travel.
- A buried soft spot. Old organic material, a buried utility trench, or fill that was never compacted.
The fix depends on which of these you have, which is why we don’t quote paver replacement before an on-site look. If water is the driver, regrading, redirecting a downspout, or correcting the slope is part of the job. Otherwise you’re paying to rebuild a base that’s about to get soaked again. This is the same principle that governs every hardscape we build, from the driveway to the fence line and the roof above it. One contractor handling the whole exterior means the drainage, the grading, and the hardscape get designed together instead of fighting each other.
What Is That White Staining on North Miami Driveways?
Efflorescence is the chalky white mineral film that appears on paver surfaces, and on a North Miami driveway it’s usually a water migration symptom, not a cosmetic flaw. The white powder is mineral salts carried to the surface by moisture moving through the paver or the mortar and slab below, left behind when the water evaporates. It can look like a stain, but it’s a message. Something is keeping that area wet long enough for water to travel through the material and back out the top.
What Efflorescence Is Telling You
- Water is entering somewhere. Often through joints, edges, or a spot with poor drainage.
- The sub-base stays damp. A base that never dries out keeps pushing moisture up.
- Fresh installations are still curing. Some efflorescence on new pavers is normal and recedes on its own.
- It’s recurring, not one-time. If it returns every wet season, the moisture source is still active.
What to Do About It
The right first step is not a bottle of cleaner. It’s confirming where the water is coming from. Cleaning the surface without addressing the moisture source means the white film comes back. Once the drainage or saturation issue is corrected, a professional-grade efflorescence cleaner and proper sealing can restore the surface and help keep it from returning. In our experience, efflorescence that keeps coming back is one of the clearest early signs of a base that’s staying wet, and it’s worth having someone look at the drainage before it turns into sinking pavers.
Why Do Weeds Keep Coming Back Through the Joints?
Weeds come back because the joint sand has failed, not because the weeds are unusually stubborn. Once the original sand washes out of the joints, you’re left with open channels full of grit, moisture, and organic debris, which is exactly what wind-blown seed needs. A North Miami driveway with heavy summer rain and strong sun tends to develop this fast, especially on stretches where water runs off the edge. Our wet-and-dry cycle is a perfect weed nursery: water fills the joint, sun warms the paver, and the seed sprouts.
The species that show up tend to be the tough, fast-spreading ones: crabgrass and goosegrass in the joints during warm months, spurge and purslane spreading low across the surface, and the creeping grasses that send runners through the sand. Vines and small woody growth can follow if a joint stays open long enough. Pulling them only removes the top. The root structure and the seedbed stay in the joint.
How Polymeric Sand Stops It Without Voiding Warranties
- Clean the joints fully. Depth matters. Polymeric sand needs a consistent joint depth to lock properly, and old sand and vegetation must come out first.
- Match the sand to the joint width. Different paver styles and joint widths call for different polymeric formulations. The wrong product either won’t fill the joint or won’t lock.
- Follow the manufacturer’s install and cure instructions. Polymeric sand has to be activated correctly and allowed to cure before the surface gets wet, or the bond never forms.
- Keep it inside the paver manufacturer’s specs. That’s how you protect the warranty instead of putting it at risk.
You choose the brand: professional-grade polymeric sand from a hardscape line we work with regularly, matched to your pavers. We handle the rest. Polymeric sand is a locked, semi-rigid joint fill that resists washout and closes the seedbed, and it’s the difference between a joint that holds for seasons and one that sprouts a new crop after every rain.
The String-Line Test: Relay or Full Base Excavation?
The string-line test tells you how bad the dip is and whether the repair is a relay (lift and reset the pavers) or a full base excavation (rebuild from the ground up). It’s simple enough to do yourself with two stakes, a length of builder’s line, and a tape measure or a short ruler. You’re checking how far the surface has dropped relative to a straight line across the problem area.
How to Run the Test
- Set two stakes at either end of the affected section, well outside the dip, on solid, level pavers.
- Tie the string tight between them at the same height on each stake, running over the dip.
- Measure the gap between the string and the paver surface at the lowest point of the dip.
- Measure across the edges too. Check whether the whole field has spread and opened joints.
Reading the Result
- Small, shallow dip with no spread. Often a bedding issue, and a relay may be enough.
- Deeper drop, same spot after rain, joints opening nearby. Base issue, and you’re likely looking at excavation and rebuild, not a reset.
- Edge restraint visibly pulled or tilted. The perimeter needs rebuilding regardless of the dip depth.
A string line can’t tell you why the base failed. A dip can come from poor compaction, a soft spot, or water. Confirming the cause is where an experienced eye pays for itself, because the fix has to match. Our technicians have up to 9 years of experience with hardscape diagnosis, and a free estimate in North Miami includes the on-site look that answers the why, not just the how deep.
Why Did Your Sealer Bubble, Cloud, or Peel?
A cloudy or bubbled sealer is almost always a moisture problem at the time of application, not a bad sealer. If the surface moisture content was wrong when the product went down, trapped moisture pushes back up through the film as it cures, and you get clouding, bubbling, or peeling as a result. On a North Miami driveway, heavy summer humidity, afternoon storms, and sun heating the pavers make this one of the easiest things to get wrong. Even a good product fails if the surface was damp, or if the air was too humid for the product to cure properly.
Florida UV exposure makes it worse. A surface sitting in intense sun cycles between hot, baked paver tops and cooler, damp base material underneath. That cycling drives moisture up, and sealer on a surface that can’t breathe traps it. It’s not a product failure. It’s a prep and timing failure.
How to Avoid a Sealer Failure
- Confirm the surface is dry. A moisture reading, not a hand test, tells you if the pavers are ready for sealer.
- Respect the product’s weather window. Too much humidity or rain coming in can ruin a cure.
- Clean and prep first. Efflorescence, old sand, and dirt have to come off before any sealer touches the pavers.
- Match the sealer to the paver. Not every paver wants the same finish, and a penetrating sealer behaves differently from a film-forming one.
If your sealer has already failed, the fix usually means stripping the film, correcting the moisture source, letting the pavers dry fully, and re-sealing correctly. Sealing over a failing film traps the problem and makes it worse. This is a job where the prep is most of the work, and it’s why we don’t recommend a sealer call without checking what the surface is actually doing.
Cracked and Chipped Pavers: Surface Problem or Something Deeper?
Cracked or chipped pavers are either a surface issue or a symptom, and the difference is whether the damage follows a pattern. Random chips on a few pavers are usually impact from vehicles, dropped loads, or edges catching a tire. Damage that runs in a straight line, or clusters around a sunken area, points to movement underneath. When the base shifts, pavers rock, and the corners and edges spall and crack as they grind against each other.
Here’s how to sort it out:
- Random, isolated chips. Vehicle impact or edge damage. Individual pavers can be lifted and replaced.
- A straight line of cracks. Movement or a structural issue, often a spreading edge or a settling base.
- Damage clustered around a dip. The sinking section is rocking and damaging its neighbors, and both need addressing.
- Surface spalling and flaking. Sometimes a moisture or salt issue at the surface, sometimes a sign the pavers themselves are staying wet.
Replacing the damaged pavers without fixing the cause just puts fresh pavers into the same failing surround, and they crack the same way. Once the base is sound and the surface is stable, individual replacements are fast, and a clean written estimate tells you whether you’re replacing ten pavers or rebuilding a section. No surprise charges once the work is approved.
Common Mistakes to Avoid
- Replacing pavers over a bad base. If the base is failing, new pavers settle into the same failure within a season. Find out why it’s sinking before you buy replacements.
- Topping up joint sand with generic sand. Ordinary sand washes out in the first heavy rain. Polymeric sand, installed to the paver manufacturer’s specs, holds.
- Sealing to hide efflorescence. A film-forming sealer over a damp or stained surface traps moisture and makes clouding and peeling far more likely.
- Ignoring a small dip. In North Miami, a shallow dip that stays wet through the rainy season is the early stage of a base failure. Catch it while it’s a relay instead of a rebuild.
- Skipping the edge restraint check. A tilted or pulled edge lets the whole field spread and is one of the most common causes of joint widening. Check the perimeter, not just the middle.
- Letting a downspout empty onto the driveway. Concentrated roof runoff is one of the biggest drivers of base saturation and repeats in the same spot each storm. Redirect it away from the pavers.
- Patching without diagnosing. Every paver repair protocol depends on which layer failed: surface, bedding, or base. Jumping to a fix before you know is how the same dip comes back next season.
See the difference
 Before
 After
 Before
 After
 Before
 After
When to Call a Professional
Call us when the sinking reappears in the same spot after rain, when joints are widening across a whole section, when the driveway drains toward your house or garage, or when a repair has already failed once. Structural work like base excavation, compaction, and edge rebuilds needs the right equipment and experience, and going wrong here means paying twice. Efflorescence that keeps returning, polymeric sand that won’t hold, and sealer that has clouded or bubbled are also worth a professional look, because each one points back to a moisture or prep issue that’s easy to identify and easy to get wrong. Call (855) 842-6980. We answer 24/7. Fast dispatch from 7am to 7pm, Sunday through Friday. North Miami Construction offers free estimates in North Miami, backed by a written line-item quote and no change orders. Our technicians have up to 9 years of experience with hardscape and material selection.
Frequently Asked Questions
Because the cause is underneath, in a base or drainage problem that isn’t being fixed. Water pooling in one spot softens and compacts the base layer a little more each rainy season, so the dip returns in the same place. Replacing the pavers at the surface won’t change anything. A proper repair addresses the base compaction and the water flow beneath. Call (855) 842-6980 for a free estimate to find the cause.
That’s efflorescence, a mineral film left behind when water moves through the paver or slab beneath and evaporates. It’s a moisture symptom, not a cosmetic flaw. Some on new pavers is normal, but recurring efflorescence on an older driveway usually means a base or drainage area is staying wet. Cleaning the surface without addressing the water source lets it return. Call (855) 842-6980, and we’ll trace where the moisture is coming from.
Sometimes. A shallow, isolated dip with no spread is often repairable by lifting the pavers, correcting the bedding sand, and re-setting them with new polymeric joint sand. If the dip is deep, recurring, or part of a larger sinking area, the base needs excavating and rebuilding, and a string-line test will help you gauge which one you have. The written estimate sets the final price. Call (855) 842-6980 to get one.
Because the joint sand has washed out, leaving space for seed and moisture. Polymeric sand is the fix: it locks the joint so seed can’t take hold and resists washout. The trick is installing it correctly to the paver manufacturer’s specs, including proper joint depth and curing, so the bond forms and the paver warranty stays intact. Call (855) 842-6980 to book an inspection and a free estimate.
The most common cause is surface moisture content at the time of application, not a defective sealer. If the pavers were damp or the humidity was too high, trapped moisture pushes through the film and clouds it. Florida sun and humidity make this easy to get wrong. The repair means stripping the film, drying the surface fully, and re-sealing correctly. Call (855) 842-6980 for a professional look.
Yes. North Miami Construction handles driveways and pavers as one of seven service categories, alongside fence installation, roofing, windows and doors, kitchen remodeling, bathroom remodeling, and home additions & ADU work. That matters on a paver job: grading, drainage, and hardscape get solved together with one accountable contractor, not three trades who never talk. Call (855) 842-6980 for a free estimate.
The Bottom Line
Paver problems in North Miami are usually diagnosed wrong because the surface gets blamed for something the base is doing. Gradual, pattern-shaped sinking means a base or drainage failure; random wobble means bedding sand is washing out; white staining means moisture is still moving through the system. Each one has a different fix, and the fix has to match or the problem comes back next wet season. Run the string-line test, note where water pools after rain, and check the edges before you spend anything. When the diagnosis points to base work, sealer failures, or persistent efflorescence, get a professional look. You choose the brand and the finish; we match the material and the repair to your driveway, backed by our access to hardscape brands like Belgard and Techo-Bloc and premium roofing lines like GAF, CertainTeed, and Owens Corning for the roof above it.
North Miami Construction offers free estimates in North Miami with a written line-item quote and no change orders. Call (855) 842-6980. We answer 24/7. Fast dispatch from 7am to 7pm, Sunday through Friday. If you’re planning a full exterior refresh, start with North Miami Construction and let one contractor handle every layer of your home.
Written by the team at North Miami Construction.